Using API for Aria OPS Chargeback
From https://blogs.vmware.com/cloudprovider/2024/02/chargeback-integration-into-aria-operations.html:
With the introduction of VMware Aria Operations version 8.16, there is a notable transformation in the way Chargeback is handled. In this release, Chargeback undergoes complete integration into VMware Aria Operations.
In contrast to previous versions, Chargeback is no longer a standalone application; rather, it has been smoothly integrated into the expansive VMware Aria Operations framework. This integration indicates that Chargeback is now an integral component of a more extensive and interconnected system or platform. It has transitioned from being an isolated tool to being intricately designed to operate seamlessly within the broader context of the VMware Aria Operations framework.
Well this is great news! But wait a minute… Our finance department had access to the “stand-alone” chargeback application where they could lookup bills and download them for other purposes. How does that work now that chargeback is integrated? Now they need access to Aria Operations. But what if you want to minimize access to Aria Operations? Maybe we can automate the steps the finance department took every month. So what do you need?
In this article I will describe the steps to login to the API, create a bill, and retrieve that bill so it can be exported to a file. I will give the information to do it manually via API calls and in another post I will combine everything in a Powershell script.
Accessing the Aria Operations API
Like many other APIs the Aria Ops API uses an authorization request to get a token and with that token you can run API calls. So the first step is to get that token. BTW I use Postman to run all API calls and I use some variables for the URL, username, and password. To get a token, run a POST to:
https://{{vrops}}/suite-api/api/auth/token/acquirewhere {{vrops}} is the name of your Aria Operations environment. In the body of the request, put this code:
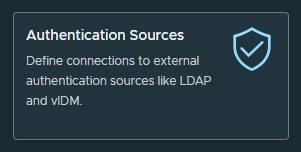
{ "username": "{{username}}", "password": "{{password}}", "authSource": "{{source}}" }The first two variables speak for themself. The third is the source for the authorization. In my situation, the Aria Operations environment is linked to Workspace ONE. You can look up the correct name through Administration, Control Panel, Authentication Sources.
After the login request you should get a response that looks like this:
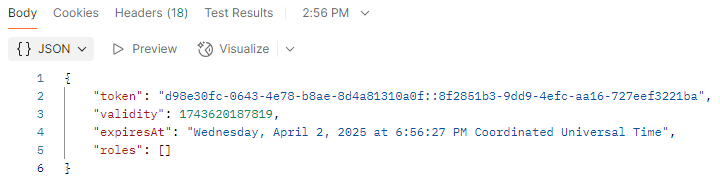
And there is your token. You could copy and past this into a variable but you can also automate this. In the same request create a post-response script.
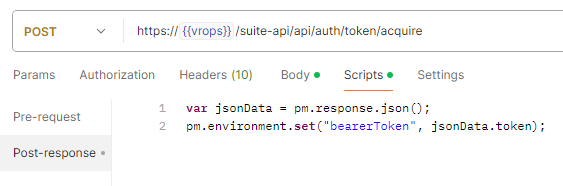
If all goes well you should have a variable called bearerToken with the content of the JSON token attribute. For every API call you run afterward, use this token to authenticate. Just add a simple header to that API call.
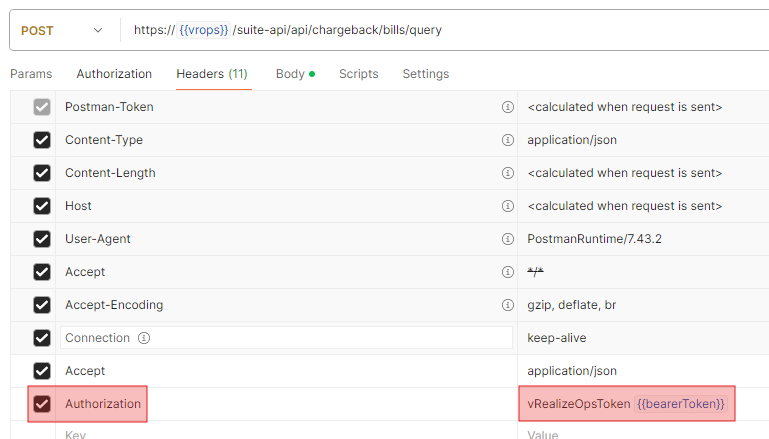
The name is Authorization, and the value is “vRealizeOpsToken”, followed by a space and the returned token. In my example, I used the variable. By the way, vRealizeOpsToken continues to be supported in VMware Aria Operations, but you can also use “OpsToken.”
Generating a bill
Now that you have access to the API, you can create a bill. This is also a POST call to this URL:
https://{{vrops}}/suite-api/api/chargeback/billsThe body of the call has the following syntax.
{
   "title" : "Test Bill Generation",
   "description" : "Test Bill Generation",
   "billingStartTime" : 1665122400000,
   "billingEndTime" : 1666322044280,
   "resourceIds" : [ "dfc2d007-be10-45c7-9fef-bd2f77b274ff" ],
   "policyId" : "5e3d8255-1c5e-48dd-92c5-b7a687c3c898",
   "timeZone" : "UTC"
}
Start and End Time
Title and description speak for themselves. But what about the billingStartTime and billingEndTime. How do you generate such a string? This notation is called Unix time.
Unix time is a date and time representation widely used in computing. It measures time by the number of non-leap seconds that have elapsed since 00:00:00 UTC on 1 January 1970, the Unix epoch. For example, at midnight on 1 January 2010, Unix time was 1262304000.
And how can you create this? With Powershell it’s easy.
[System.DateTimeOffset]::new($(Get-Date)).ToUnixTimeMilliseconds()If you want to generate this for a specific date just change the Get-Date part.
Resource ID
The next attribute is resourceIds. This is the ID of the resource you want to generate the bill for. This could be the ID of a particular virtual data center (Org VDC). In this example I want to know the ID of the Org VDC “Hosting”. Run a GET call to this URL:
https://{vrops}/suite-api/api/adapterkinds/vCloud/resourcekinds/ORG_VDC/resources?name=HostingThe ID is in the ResourceList[0], Identier.
Policy ID
The last attribute is the policyId. This is the ID of the policy that describes the pricing etc. You can retrieve all policies with a GET call to this URL:
https://{vrops}/suite-api/api/policies?activesOnly=true&_no_links=trueThe output is a list of policies with their name and ID. Get the ID of the policy you would like to use.
Create the bill
Now we have all the ingredients to create a bill through an API call. Let’s do it! Do a POST call to this URL:
https://{{vrops}}/suite-api/api/chargeback/billsThe body looks like this (with all the saved attributes):
{
   "title" : "Test Bill Generation",
   "description" : "Test Bill Generation",
   "billingStartTime" : 1741685201510,
   "billingEndTime" : 1744360028272,
   "resourceIds" : [ "{{resourceIdentifier}}" ],
   "policyId" : "{{policyId}}",
   "timeZone" : "UTC"
}
When everything goes ok, you get a similar response:
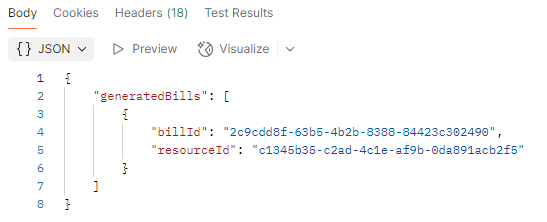
You want to save the billId to a variable because you need it to get the bill with all its details. You can do this with a Post-response script:
var jsonData = pm.response.json();
pm.environment.set("billId", jsonData.generatedBills[0].billId);
Get the bill
Now that the bill is created, the last step is to retrieve the bill. This a very simple GET call to this URL:
https://{{vrops}}/suite-api/api/chargeback/bills/{id}The ID is the billId from the previous call. With the saved variable the URL looks like this:

And the response looks like this:
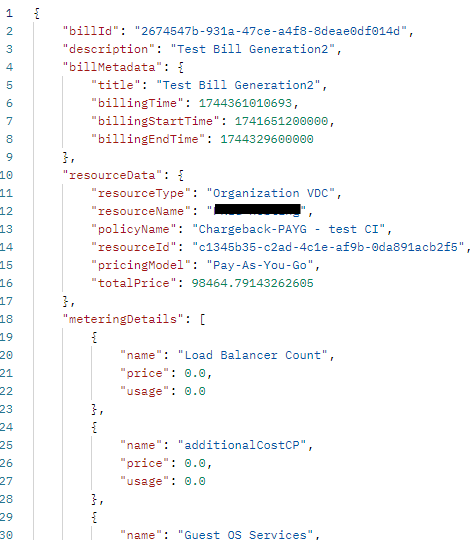
So there you have it. Through a series of API calls you can login, get the resources, create the bill, and retrieve the bill with all its details. In the next post I will convert this into a Powershell script which can be scheduled so everything is automated.